Hjemmeriet


Webshop


My page

Login to My page

Sign up for News letters


  Svenska    Norske    Deutch


Loading...

Fermentation

Fermentation is a way of processing and preserving foods by the of means micro-organisms.

Introduction

An old method for preservation of foods

Fermentation is not a new phenomenon but an old method to preserve all kinds of food by the means of little microorganisms – a preservation method that has been known and practiced for thousands of years amongst almost all cultures of the world.

From a time where people had no means of canning or refrigerating foods, fermentation along with salting, drying and smoking, was a convenient way of prolonging freshness and stability of foods beyond its natural freshness. Fermentation made it possible to preserve nutritious foods sources well into the the long winter months when fresh foods were sparse and not enough. Fermentation has also been used a way of processing fresh foods that were otherwise inedible but gained pleasant and palatable qualities from fermenation. This is the case with olives that are oftentimes fermented to remove the natural bitterness.

Almost every culture on earth have developed and had their own unique traditions for making fermented foods and thereby exist many recipes and specialities today. Not seldom have these fermented foods even been associated with health claims amongst people who consumed them and sometimes used for medical purposes. The main purpose of fermentation has however always been to preserve and prepare foods and produce palatable specialities.

The tradition for fermentations of fruits and vegetables seems to originate from eastern Asia from where it has spread to Europe through Russia. The most well-known traditions are probably sauerkraut, kimchi and fermented olives - just to name a few - but there lots more. In fact, there are endless choices as to which fruits and vegetables you can ferment and combine to develop your own unique flavours and recipes. 

Below is a link to a list of some of the world’s fermented foods and their origin. You might find you already know many of them but perhaps never thought of them as fermented foods: https://en.wikipedia.org/wiki/List_of_fermented_foods

Popularity revived – health is the new black

In recent years, fermentation has found its way back into both fine and ordinary cuisines as scientist are beginning to uncover a correlation between the microorganism that live in out gut and our overall health. Not only do beneficial microorganisms nurture our gut environment, they thereby nurture our entire body with nutrients that lay the grounds for physical and mental well-being. 

Several studies are now suggesting that chronic diseases like ADHD, Alzheimer’s, Parkinson’s and diabetes, might be influenced by the composition of the gut flora and symptoms could be relieved to some extent by healthy lifestyle and healthy food choices. Nurturing the gut with pre- and probiotic rich foods like fermented foods helps to keep our digestive tract healthy and replenish our gut flora with healthy microorganisms. Some claim to have tested a portion of sauerkraut (150 g) and found it to contain as much as 10 trillion bacteria which is far higher than any other food or food supplement. 

Microbes are everywhere in our surroundings, they live on us and inside of us and they are especially important in our digestive tracts where they help our bodies digest and absorb nutrients, make vitamins, antibiotics, strengthen our immune systems and protect us from pathogens. When we consume fermented vegetables, we nurture our bodies with species of beneficial microorganisms and easy-to-digest vegetables that can help us maintain a healthy gut. As an extra bonus, the microbes have pre-digested the fibres in the vegetables by breaking down the cell walls and thereby making nutrients more available to us.

Vegetable fermentation is therefore becoming so much more than just a convenient way of preserving foods – it is health, traditions and beautiful food experiences yet to be discovered by many of us.

What is fermentation?

What is fermentation?

Fermentation can be defined as a metabolic process where microorganisms break down carbohydrates into organic acids and alcohol, while secreting gasses and different substances in the process.  The microorganisms responsible for the fermentation process is a mix of bacteria, fungi and yeasts that are also naturally occurring everywhere in the world – even on fruits and vegetables and it is their presence we depend upon when we ferment fruits and vegetables. 

The moment a fruit or vegetable is picked from its source of life, microorganisms gradually begin to break it down and produce various substances as process. This normally happens in the presence of oxygen and most of us know this process as a foul-smelling rotting process where fruit and vegetables turn slimy and develop patches of moulds. When we ferment vegetables with microorganisms, something quite different happen because we provide an oxygen free environment. Only anaerobic bacteria thrive under such conditions and these are mainly healthy lactic acid bacteria.  When we provide an oxygen-free environment the beneficial bacteria get a head start in the fermentation process and this keeps unwanted bacteria from developing and contaminating the vegetables. The result is a much different process where fruits and vegetables are preserved rather than going through a rotting process, as it would normally happen in the presence of oxygen. 

Most importantly when we ferment, is therefore to provide an oxygen-free environment by ensuring what we ferment is submerged in a brine throughout the entire fermentation process. Brine is usually created either by salting fruits and vegetables and thereby drawing out their juices - or simply making and adding a vegetable brine. If we fail to ferment them in an oxygen free environment, ferments usually develop patches of mould and end up being unsuitable for consumption.

The fermentation process

A fermentation process is set off when microbes begin to digest sugars that are released from the vegetables into the brine as a result of salting, crushing and slicing vegetables fibres. 

These beneficial microbes convert carbohydrates into the following substances:

Lactic acid bacteria convert sugars into lactic acid.
Yeasts convert sugars into alcohol.
Acetic acid bacteria convert alcohol into acetic acid.

As lactic acid bacteria convert sugars into lactic acid, they thereby steadily cause acidity to rise in the brine. The longer it ferments, the more acidic it becomes. 

This is very fortunate since acidity prevents unwanted pathogenic bacteria from growing and getting a foothold. Thus, ferments with a pH level under 4,6 is usually considered to be free of pathogens and safe to consume. Indeed bad microorganisms can also make their way into ferments and given the right conditions they will profilerate on the sugars too. Mould is an example of a pathogen that could make the ferment unsuitable for consumption as it produces toxins. We are not interested in getting any of these pathogens into to our ferments nor our bodies where they act as toxins and cause disease. Fortunately, this is easy avoidable by controlling the ferment and providing optimal conditions for the beneficial microorganisms. 

The lactic acid and acetic acid made by the microorganisms preserves the fruit and vegetables in a way that keeps them fresh for weeks, months or even years, provided they are stored under the right conditions. From time to time we hear stories of decades old ferments being found and still seem to be perfectly safe to eat.

Theory

To successfully make fermented foods, it is important to know the basics behind the process.

The bacteria

Three bacterial phases

There are three bacterial phases in a fermentation process caracterized by what species of bacteria dominate at a given time in the process:

  1. Leuconostoc mesenteroides (L.men., coccus type)
    This lactic acid bacteria dominates in the first phase from the onset of the ferment and 5-7 days in. It is tolerant to salt, moderate levels of acidity and thrives optimally at temperatures around 21°C.  It converts sugars into lactic acid, carbon dioxide and a small amount of alcohol. Leuconostoc mesenteroides uses up any oxygen that might be in the ferment in the beginning but remains active even in the absence of oxygen. The carbon dioxide produced by the bacteria will rise to the surface as bubbles and press oxygen out of the fermentation jar, thereby creating an anaerobic environment. This oxygen-free environment prevents pathogens from establishing in early stages of the ferment. Leuconostoc mesenteroides dominates and remain active until acidity levels become too high for it to thrive in. From then, Lactobacillus species takes over and dominate since they tolerate higher levels of acidity.

  2. Lactobacillus plantarum (L.pla., bacillus type)
    This species is less tolerant to salt than Leuconostoc mesenteroides but it tolerates higher levels of acidity and temperatures above 22°C. L. plantarum dominates when Leuconostoc mesenteroides become inactive and well into the later stages of the fermentation process. L. plantarum thrives in aerobic as well as anaerobic environments and remain active until acidity levels rise too high. Large amounts of salt and low temperatures inhibit the activity of L. plantarum.

  3. Lactobacillus brevis and Lactobacillus pentoaceticus (bacillus typer).
    L. brevis tolerate high levels of acidity and flourish when L. plantarum becomes inactive in the last period of the fermentation process. L. brevis finishes off the fermentations process during the last week of the fermentation.

Thus, all it requires be successful at fermentation is to provide best possible conditions for the lactic acid bacteria and this is done by securing the right temperatures, enough sugars and enough brine to keep the ferment oxygen free. The better lactic acid bacteria thrive from the onset of the ferment the faster the brine acidifies and prevent pathogens from getting a foothold. 

Since most lactic acid bacteria thrive around 21°C, that is the optimal temperature for fermentation. If you ferment at a few degrees lower, this will slow the microbial processes to a point where fermentation is slowed and might affect the quality of the result. For this reason, it is vital you check the temperature and ensure it is fairly constant where you ferment it. A temperature range between 18 – 22°C would be ideal for the first phase of fermentation where Leuconostoc mesenteroides is active, while a temperature above 22°C serve Lactobacillus species that are active in the later stages of the fermentation better. Your ferment would therefore benefit from being moved to a warmer place with temperatures up to 30°C - after 5-7 days into the fermentation. Just keep in mind – the higher the temperature is the faster it ferments and the more acidic it gets.

We recommend you leave the fermentation jar on the kitchen counter for the first 5-7 days for the first phase and the move it to the top of the fridge. This is usually a nice and warm spot for the fermentation to progress. 

Lower temperatures slow fermentation and you must wait longer for the same result. If you provide the prefect temperatures you can actually eat it after only 5-7 days whereas at lower temperatures, you must wait 2 weeks for it to reach he same stage. However even when you provide the optimal temperatures, we recommend you ferment it for at least 3-6 weeks. The probiotic content will a lot higher then and flavours more distinct but the choice is yours. 

The fermentation process is complete when no more bubbles rise to the surface of the brine and that usually happens after 3-6 weeks. Store the ferment in the fridge as it is - or in agents like vinegar and herbs or oil and herbs. It can stay stable for month under these conditions.

Apart from vegetables - a successful ferment contains quite a bit of lactic acid, carbon dioxide, small amount of alcohol, acetic acid, propionic acid and aromatic esters. Aromatic esters form in the presence of acids and alcohol and contribute with unique flavourings.

Dry salting

Dry salting

Preparing fruit and vegetables for fermentation by dry-salting means you sprinkle them with salt to extract sugars and juices and use it as a brine. No extra water is added it. The salt will rapidly draw water from the vegetables by osmosis and thereby produce enough juice to submerged the vegetables in the fermentation jar. Make sure to distribute and massage the salt evenly into the vegetables as an ueven distribution could make the result less successful.

For 1 kg of vegetables - use 20-40 g of salt.

When you dry-salt vegetables, there are two ways of doing it depending upon what sort of vegetables you are preparing:

  • For cabbage and other finely sliced vegetables - in a bowl, sprinkle the shredded vegetables like with the right amount of salt and massage it in using your hands and sligtly crushing the vegetable fibre if needed. Soon juices will begin to extract and a brine forms in the bowl. After 15minutes, fill the cabbage into the fermentation jar along with the brine and press firmly down on the vegetables to eliminate any air pockets and submerge them in brine. Sauerkraut is made in this way - as is any recipe that has at least 75% cabbage in it.

  • Coarse vegetables like carrots, beet, celery root and potatoes are not suitable for the same way of saltning as cabbage or finely shredded vegetables. Rinse these vegetabes well under cold water, cut or shred them. Layer them into a fermentation jar, making 2,5 cm thick layers and sprinkle salt in-between. This draws water from the vegetables. Press firmly down on each layer to rid air any pockets and squeeze out juices. After 24 hours, the salt should have drawn enough juices to submerge the vegetables completely and the fermentation process automatically sets off.

No matter how you salt, when the vegetables are packed into the jar as descirbed above (only fill up the fermentation jar by 75%) - finish off by placing either clean cabbage leaves on top, a clean cheese cloth or piece of cheese mat. Then lay weighing stones on top to hod everything down. It is very important to weigh the vegetables down under the brine as they will otherwise rise to the surface and be exposed to oxygen. If you have no fermentation stones at hand, use a glass or anything you can think off to will weigh the vegtables down as long as it is clean and made from glass or stoneware. Metal and other materials can corrode and contaminate the brine due to presence of salt and acids. We do not reccomend you ever it in combination with fermented foods.

Brine saltning

Brine salting

Some vegetables, when you salt them, do no give off enough juices to make a brine fast enough to keep the vegetables in an oxygen-free environment. This mostly applies to when you ferment whole vegetables like carrots, cucumbers or whole cabbage heads. To ferment whole vegetables, you need to make a salt brine to submerge them in and then gradually will the salt extract sugars and juices from the vegetables just as when you dry-salt - it just takes a litte longer.

How to make a brine

In 1 litre of water (20°C) you can dissolve 350 g salt.

The weight of the brine is then 1350 g and the salt percentage by weight is
110 * ( 350 / 1350 ) = 25,9%

If you add more salt it will not dissolve as this solution is fully saturated.

This means the water is 100% saturated by 350g salt and that is the maximum you add to 1 litre water. 

Brines for fermentation should only have a 15-20% saturation.

To make a 15% saturated brine, mix 1 litre of water with 15% of 350 g salt  = 53 g salt

To make a 20% saturated brine, mix 1 litre of water with 20% of 350 g salt = 70 g salt

Note:
It is important to understand that a 15% salt brine does not mean 15% is salt. 
A 15% brine is 15% of how much salt it is possible to dissolve in 1 litre of water.
A 15% brine will by weight contain 5.3% salt.


Place the vegetables in ther fermentation jar and submerge them in the brine. The salt will soon begin to bring out the juices and sugars for the microorganisms to feed on but be aware, when this happens it also dilutes the saltiness of the brine. You may therefore need to add a little extra salt from time to time to ensure the saturation does not drop beyond 12%. If the brine becomes less salty, it slows the rate by which sugars and juices are extracted from the vegetables and this in turn affects the activity of the microbes. 

Most vegetables ferment well in a 12,5% to 20% saturated brine and the microorganisms thrive just the same as they do when you use the dry-salting method. 

The salt

Salt

We add salt to fruits and vegetables to extract the juices and sugars and form a brine that will nurture microorganisms. The easy accessible sugars in the brine enables the lactic acid bacteria to rapidly multiply and secrete lactic acid which ensures a successful result. Adding too much salt however, can also inhibit the activity of the lactic acid bacteria since not all species are tolerant to high levels of salt. Therefore, it is important not to salt too much but find the perfect balance.

The adding of salt usually extracts enough juice from the cut and sliced vegetables to form a brine that submerge them completely in the fermentation jar. 

Salt also contributes with crunchiness too as it hardens the pectins (complex sugars) in fruits and vegetables.

Regular salt is perfectly alright to use if it has no additives or anti-caking agents in it.

Also note that:

  • Salt with impurities of calcium can alkalize the brine and make vegetables less crunchy.

  • Salt with impurities of iron can cause black colouring on the vegetables.

  • Salt with impurities of magnesium can make vegetables bitter.

How much salt do I add?

Never salt the vegetables with more than 1,5 to 2,5% of the total weight of the vegetables. Adding higher amounts of salt can inhibit the growth of some species of lactic acid bateria that are not quite as tolerant to high levels of salt as are some pathogenic microorganism. If you aim for 1,5 - 2,5% salt you only moderately inhibit L. mesenteroides that are active in the beginning of the fermentation process. Remember it is not the salt content that prevents pathogens from getting a foothold, it is the acidic environment created by the lactic acid bacteria. Therefore, it is important to ensure saltiness does not compromise the growth of beneficial microorganisms.

We recommend you never add extra water to the brine as it dilutes the density of sugars and drives out small amounts of oxygen that can be beneficial to Leuconostoc mesenteroides. If you need to add more liquid to cover the vegetables, add no more than 2-4% water.

Should you for any reason wish to use less salt, you can do so by making a brine from stalk cellery juice and add a probiotic starter culture to it. 
The stalk celery juice supplies the microorganisms with sugars to live off and the starter culture super-charge the brine with lactic acid bacteria to ensure a quick rise in acidity. Read more under the starter culture section.

Fruits

Fruits

Fruits contain more sugars than most vegetables and fermentation with fruits therefore tends to turn out more like an alcohol fermentation rather than a lactic acid fermentation. If you want to ferment fruits, we recommend you add a starter culture with lactic acid bacteria to direct the process more towards a lactic acid fermentation. It is also a good idea to mix fruits and vegetables in the same ferment as that will naturally reduce the sugar content and promote better lactic acid fermentation. Read more under the starter culture section.

Starter cultures

Starter cultures

A starter culture is a mix of lactic acid bacteria that can be added to the vegetables to ensure a high probiotic content right from the onset of the fermenation and thereby also fast drop in pH that inhibts the growth of pathogenic microorganisms.

It is optional and essentially not necessary to use starter culture because the beneficial microorganisms are already present on the vegetables but we can never really know for sure how many nor which species are present. It depends upon in which soils the vegetables have grown and how they have been handled. When we base fermentations on the development of whatever microorganisms are naturally present and hope for the best, it is famously called wild fermentation.

By adding starter culture, you super-charge the brine with probiotic content and thereby also control what species will dominate right from the onset of the fermentation  through to the end. This makes the result predictable and consistently good every time

Chose a starter culture with a combination of species that are beneficial to the fermentation process and suit your preferences. You might have preferences as to which species you want to develop in you ferments, as all species have different properties and you will find there are many different starter cultures on the market made for vegetable fermentation. Some contains a few species whereas others contain a more complex mix. They are usually freeze dried powders and very easy to use.

Alternatively to freeze dried starter cultures, you can also use a probiotic rich culture like water kefir or brine from a previous ferment to culture the vegetables. Use them only if they are not too acidic as this usually indicates a high content of Lactobacillus species while Leuconostoc mesenteroides are low. This could make the vegetables less crunchy and that is problematic if you are aiming for just that.

Regardless of which starter culture you choose:

Mix it in thoroughy with the brine or the vegetables before you jar them. Make sure it is disolved properly and evenly distributed. Follow the instructions on the package they came in to be on the safe side.

If you for any reason prefer to use less or no salt in your vegetables, make some juice from stalk cellery and use it as a brine to submerge the vegetables in. Always add a starter culture to the juice. The sugars in the stalk celery juice feeds the beneficial bacteria and the high probiotic from the starter culture super-charge the brine and inhibits the development of pathogens.

Dissolve the starter culture in the stalk celery juice (must have room temperature) and dissolve it well. Leave it to sit on the side for 20 minutes, then add the juice to the fermentation jar to cover the vegetables. Make sure they are fully submerged in juice and carefully press own on the vegetables to eliminate any airpockets. Put a cabbage leave or piece of cheese mat on top, then a weight to hold everything down under the surface. Seal the jar and ferment as when fermenting with salt.

Fermenting fruits with starter culture

Fruit contain a lot more sugar than most vegetables and fruit fermentation therefore tends to develop more into an alcohol fermentation rather than a lactic acid fermentation. To direct the process more towards a lactic acid fermentation we recommend you add starter culture to increase the probiotic content. It is also a good idea to mix fruit and vegetables to reduce the sugar content and enhance lactic acid fermentaion.

Best Practice

It is fun, easy and requires very little time and effort to ferment vegetables at home. The hardest part is patiently waiting for the result but is usually worthwhile the wait once you taste how good it is.

You can ferment and combine all kinds of vegetables, fruits, seeds and herbs.
Be inspired by some of our recipes or make up your own favourite recipes.

We recommend you always use fresh organic fruits or vegetables for fermentation.
Never use anything with dark spots or moulds on it, or in any other way seem not fresh. 

Note, fruits contain more sugar and therefore tend turn out like more of an alcohol fermentation rather than a lactic acid fermentation. If you want to ferment fruits, we recommend you always add a starter culture with lactic acid bacteria to promote lactic acid fermentation rather than alcohol fermentation. Please read under the starter culture section.

Below is a simplified overview of the preparation process - for more details, read on.

  • Cut the vegetables or fruits - a thin cut increases the surface area for the bacteria and salt to work on.

  • Salt fruits and vegetables either by dry-salting or brine-saltning depending upon what you are going to ferment.

  • Optional: Add a starter culture.

  • Pack the vegetables in to the fermentation jar submerging them in brine.

  • Put a weighing stone or glass on top of the vegetables to keep them submerged in brine throughout the fermentation.

  • Seal the fermentation jar and leave it at room temperature 18-22°C for 4-5 days.

  • After 4-5 days, move the fermentation jar to a warmer place with temperatures above 21°C and leave it there for 3-6 weeks. You can eat it after 5-7 days but the probiotic content increases the longer you let it ferment. The fermentation is complete when no more bubbles rise to the surface – usually after 3-6 weeks.

  • Move the fermentation jar to the refrigerator where the process will continue at a slower rate.

Basic rules

Rules of thumb

  • To dry-salt vegetables: Use 2-4% salt based on the weight of the vegetables.

  • To brine-salt: Make a 15-20% salt saturated brine. That means using 5-7% salt based on the weight of the vegetables.

  • Only weigh vegetables after rinsing and drying them. Use the scales to figure out how much salt you need. Never estimate salt by its volume because that can vary depending on the type of salt.

  • Use only fresh, ripe and healthy looking vegetables in ferments.

  • Use high quality salt with no additives such as iodine or anti-caking agents. Impurities might impact the fermentation negatively.

  • Keep high standards of cleanliness. Only use clean euipment and make sure the fermentation jar is clean.

  • Make sure to distribute salt evenly in the vegetables.

  • Press down on each layer of vegetables as you make in the fermenation jar to help eliminate air pockets and squeeze out more juices.

  • Only fill the fermentation jar 75% as the vegetables might expand as they ferment.

  • Ensure the vegetables are submerged in brine at all times.

  • Provide a steady fermentation temperature between 18-22°C.

Hygiene

Hygiene

Be mindful of hygiene when you ferment fruits and vegetables. No need to be obsessed, just be aware that unwanted microorganisms are everywhere and you do not want them in your fermentation jar but since good microorganisms greatly outnumber the bad ones in occurance, keeping normal standards of cleanliness is usually enough. Use only healthy pieces of fruit and vegetables. 

Wash your hands with soap and rinse them thoroughly if you plan on using bare hands to cut and handle the vegetables – otherwise, use food safe plastic gloves. These can be an advantage too if you are going to massage salt into cabbage and have scratches on your hands. Be aware that a ring or similar cannot be cleaned sufficiently. If you wear a ring you must use plastic gloves.

Make sure all equipment and especially the fermentation jar is clean. Be careful not to introduce unwanted bacteria to the ferment from fingers or forks during the fermentation process.

Useful tools

Tools for fermentation

Making fermented fruits and vegetables do not require a lot of special equipment even though there are things that might be helpful. All you need is some basic kitchen tools and a suitable fermentation jar:

Handy kitchen tools

Cutting board

Fruit jars

Glass bottles

Bowls

Colander

Knife

Blender

Vegetable slicer

Measuring cup

Scales

Plastic gloves

Fermentation equipment

You can ferment fruits and vegetables in old fruit jars with lid or similar – or you can use a special fermentation crock pot. The most important thing is that it keeps the oxygen out and carbon dioxide can escape either automatically or by you letting it out once every day. This is crucial to prevent pressure developing. Never ferment in anything made from metal or plastic as the acids might corrode the material and contaminate the ferment.

Glass jars

You can use old fruit jars, mason jars or a similar glass container with lid to prevent oxygen from flowing in. The carbon dioxide that develops inside the jar must be aired out daily to prevent pressure from developing and cause damage to the jar, eitehr manually or by using an airlock. An airlock lets out carbon dioxide as it develops and prevent air from flowing in and you do not have to worry about rememberin to release the pressure. Air locks can be fitted onto special plastic lids that will fit onto any glass jar with standard sized mouth.

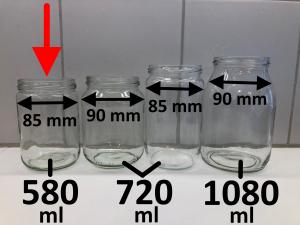
Glass jar (without lid) - 587 ml


Glass jar (without lid) - 587 ml - for 82 mm lid

Glass jar (without lid) - 587 ml

Price for
1 item: 15,00 DKK
5 items: 65,00 DKK

Glass jar (without lid) - 587 ml
 Glass jar (without lid) - 587 ml
Price for
1 item: 15,00 DKK
5 items: 65,00 DKK

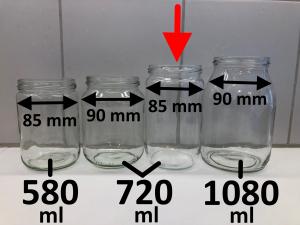
Glass jar (without lid) - 720 ml


Glass jar (without lid) - 720 ml - for 82 mm lid

Glass jar (without lid) - 720 ml

Out of stock


Price for
1 item: 18,00 DKK
5 items: 80,00 DKK

Glass jar (without lid) - 720 ml
 Glass jar (without lid) - 720 ml
Out of stock
Price for
1 item: 18,00 DKK
5 items: 80,00 DKK

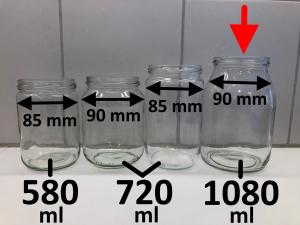
Glass jar (without lid) - 1062 ml


Glass jar (without lid) - 1062 ml - for 82 mm lid

Glass jar (without lid) - 1062 ml

Out of stock


Price for
1 item: 26,00 DKK

Glass jar (without lid) - 1062 ml
 Glass jar (without lid) - 1062 ml
Out of stock
Price for
1 item: 26,00 DKK

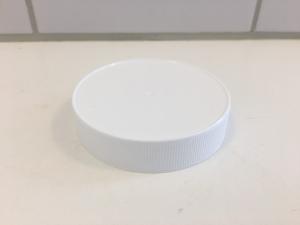
Plastic lid - 82 mm

Plastic lid - 82 mm

Price for
1 item: 6,00 DKK

Plastic lid - 82 mm
 Plastic lid - 82 mm
Price for
1 item: 6,00 DKK

Metal lid - 82mm

Metal lid - 82mm

Price for
1 item: 6,00 DKK

Metal lid - 82mm
 Metal lid - 82mm
Price for
1 item: 6,00 DKK

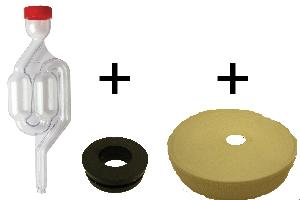
Lid kit with air lock for fermentation


Air lock and lid with hole and rubber packing for fermentation.

Lid kit with air lock for fermentation

Price for
1 item: 30,00 DKK

Lid kit with air lock for fermentation
 Lid kit with air lock for fermentation
Price for
1 item: 30,00 DKK

Fermentation crock pot

Special fermentation crock pots can take bigger volumes and you can ferment larger portions of vegetables in them. They have built-in water locks at the top to let out the carbon dioxide and keep oxygen out, all you need to do is fill the channel at the top with water before you put the lid on and start the ferment. These are ceramic pots and come in different sizes.

Fermenting crock pot - 5 litres


5 litres fermenting crock pot with lid and weighing stones

Fermenting crock pot - 5 litres

Price for
1 item: 485,00 DKK
2 items: 890,00 DKK

Fermenting crock pot - 5 litres
 Fermenting crock pot - 5 litres
Price for
1 item: 485,00 DKK
2 items: 890,00 DKK

Fermenting crock pot - 10 litres


10 litres fermenting crock pot with lid and weighing stones

Fermenting crock pot - 10 litres

Out of stock


Price for
1 item: 640,00 DKK

Fermenting crock pot - 10 litres
 Fermenting crock pot - 10 litres
Out of stock
Price for
1 item: 640,00 DKK

Cabbage Tamper

Use it to crush cabbage fibres when salting and to help pack the cabbage firmly into the fermentation jar to eliminate air pockets where unwanted bacteria might thrive. You can easily use your hands but a cabbage tamper can be a useful tool, especially if you are making large portions of sauerkraut or simply find it hard to twist your hands in to the mouth of regular glass jars.

Wooden cabbage tamper

Wooden cabbage tamper

Out of stock


Price for
1 item: 80,00 DKK

Wooden cabbage tamper
 Wooden cabbage tamper
Out of stock
Price for
1 item: 80,00 DKK

Wooden cabbage tamper - Double


Wooden cabbage tamper for making sauerkraut

Wooden cabbage tamper - Double

Out of stock


Price for
1 item: 310,00 DKK

Wooden cabbage tamper - Double
 Wooden cabbage tamper - Double
Out of stock
Price for
1 item: 310,00 DKK

Clay stones and cheese mat

The most important thing when you ferment is to ensure the vegetables are submerged in brine at all times to keep the ferment in an anaerobic environment. Even if you try to push the vegetables well beneath the surface of the brine and they look as if they might stay there – do not be fooled! They will slowly rise to the surface if not weighed down. Use a few cabbage leaves to tug over the vegetables and hold them under the brine. Make sure the leaves are claen and put a clean glass or similar on top to weigh everything down before you seal the jar.

Another option is to use a piece of cheese mat or a clean muslin on top of the vegetables and add weighing stones on top of that to keep everything down. Weighing stones for fermentation come in different sizes.

Cheese mat, coarse


Cheese mat with coarse mesh - to be cut to fit fermentation jars

Cheese mat, coarse

Price for
1 item: 25,00 DKK

Cheese mat, coarse
 Cheese mat, coarse
Price for
1 item: 25,00 DKK

Ceramic weight for jar fermentation - Ø 76 mm (approx.)


Ceramic weight for pressing down vegetables to keep them covered in brine during fermentation

Ceramic weight for jar fermentation - Ø 76 mm (approx.)

Out of stock


Price for
1 item: 86,00 DKK
3 items: 240,00 DKK

Ceramic weight for jar fermentation - Ø 76 mm (approx.)
 Ceramic weight for jar fermentation - Ø 76 mm (approx.)
Out of stock
Price for
1 item: 86,00 DKK
3 items: 240,00 DKK

Ceramic weight for jar fermentation - Ø 95 mm (approx.)


Ceramic weight for pressing down vegetables to keep them covered in brine during fermentation.

Ceramic weight for jar fermentation - Ø 95 mm (approx.)

Out of stock


Price for
1 item: 98,00 DKK
3 items: 270,00 DKK

Ceramic weight for jar fermentation - Ø 95 mm (approx.)
 Ceramic weight for jar fermentation - Ø 95 mm (approx.)
Out of stock
Price for
1 item: 98,00 DKK
3 items: 270,00 DKK

Ceramic weight for jar fermentation - Ø 105 mm (approx.)


Ceramic weight for pressing down vegetables to keep them covered in brine during fermentation.

Ceramic weight for jar fermentation - Ø 105 mm (approx.)

Out of stock


Price for
1 item: 108,00 DKK
3 items: 300,00 DKK

Ceramic weight for jar fermentation - Ø 105 mm (approx.)
 Ceramic weight for jar fermentation - Ø 105 mm (approx.)
Out of stock
Price for
1 item: 108,00 DKK
3 items: 300,00 DKK

Miscellaneous

The following may also be of use:

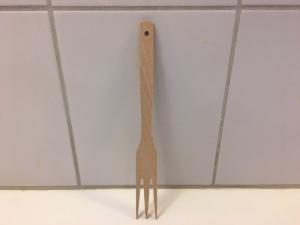
Sauerkraut fork

Sauerkraut fork

Out of stock


Price for
1 item: 30,00 DKK
4 items: 100,00 DKK

Sauerkraut fork
 Sauerkraut fork
Out of stock
Price for
1 item: 30,00 DKK
4 items: 100,00 DKK

Mandoline slicer 40 cm in beech wood with finger guard


Mandoline slicer in beech wood - Including finger guard

Mandoline slicer 40 cm in beech wood with finger guard

Out of stock


Price for
1 item: 410,00 DKK

Mandoline slicer 40 cm in beech wood with finger guard
 Mandoline slicer 40 cm in beech wood with finger guard
Out of stock
Price for
1 item: 410,00 DKK

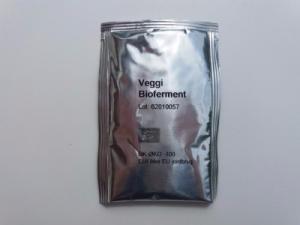
Starter culture for fermenting vegetables


Starter culture for fermenting vegetables - For 10 kg

Starter culture for fermenting vegetables

Price for
1 item: 32,00 DKK
3 items: 84,00 DKK
6 items: 164,00 DKK

Starter culture for fermenting vegetables
Culture properties: Starter culture for fermenting vegetables


Contains the following:

O

 - Lactococcus lactis sp. lactis

V

 - Lactobacillus plantarum

 Starter culture for fermenting vegetables
Price for
1 item: 32,00 DKK
3 items: 84,00 DKK
6 items: 164,00 DKK

Starter culture for fermenting vegetables - 6 sachets - Cutting Edge


Starter culture for fermenting vegetables - 6 sachets

Starter culture for fermenting vegetables - 6 sachets - Cutting Edge

Out of stock


Price for
1 item: 230,00 DKK

Starter culture for fermenting vegetables - 6 sachets - Cutting Edge
Culture properties: Starter culture for fermenting vegetables - 6 sachets - Cutting Edge


Contains the following:

L

 - Leuconostoc sp. mesenteroides

PEAC

 - Pediococcus acidilactici

V

 - Lactobacillus plantarum

 Starter culture for fermenting vegetables - 6 sachets - Cutting Edge
Out of stock
Price for
1 item: 230,00 DKK

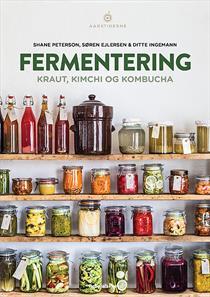
Fermentering - Kraut, Kimchi og Kombucha - In Danish only


Bogen om fermentering

Fermentering - Kraut, Kimchi og Kombucha - In Danish only

Price for
1 item: 198,00 DKK

Fermentering - Kraut, Kimchi og Kombucha - In Danish only
 Fermentering - Kraut, Kimchi og Kombucha - In Danish only
Price for
1 item: 198,00 DKK


Sources of inspiration

Sources of inspiration

FERMENTED FRUITS AND VEGETABLES.  A GLOBAL PERSPECTIVE:
http://www.fao.org/docrep/x0560e/x0560e00.htm#con


Problem and solutions

Trouble shooting

If the beneficial bacteria do not thrive during the fermentation process the result might be less than optimal.

Should a white film appear on the surface of the brine and likewise, a white gritty layer on the bottom – This is alright. This is a by-product of yeast activity. It often occurs if the vegetables are not fully submerged in brine or if the fermentation jar allows air in.

Here is a list of potential problems:

  • Less crunchy sauerkraut may be a cause of too much oxygen during the early stages, low or uneven distribution of salt and failure to provide steady temperatures during the fermentation process.
    - Bacillus species (L. plantarum and L. brevis) seem to be better at breaking down the vegetable fibres than the coccus species like Leuconostoc mesenteroides. Conditions that favours L. bacillus species (low salinity, high temperatures and low or inactive levels of coccus species) may make the vegetables less crunchy.

  • Suspicious colouring is a sign of contamination from unwanted bacteria during the ferment.
    - Unevenly distributed salt may inhibit the growth of beneficial bacteria while more salt tolerant species like pathogens proliferate.
    - Too little brine to cover the vegetables during the ferment exposes them to oxygen and unwanted microorganisms such as moulds. This adds bitterness to the flavour and discolours brine and vegetables – such ferments should never be consumed!
    - If temperatures are too high during the fermentation it may also benefit the growth of unwanted bacteria which darkens the colour of the ferment and must never be consumed.
    - Red colouring of the brine can appear from a species of yeast that produces a strong red pigment. This is caused by an uneven distribution of salt or too much salt, as yeast under proliferate both conditions. If you provide optimal conditions during the fermentation these yeast types will naturally be supressed.

  • Slimy ferments is fermentation gone wrong and indicates either too much or too little salt – or uneven distribution of salt when salting.

Recipes

Recipes

In this section we give you all of our favorite recipes and the last section provides links to other websites for more recipes. Be bold and play with it - fermentation is fun. Try to ferment what is in season, combining vegetables, herbs and fruits to create unique seasonal food experiences and know that, most vegetables taste quite different and so much better when they are fermented.

Enjoy fermented vegetables as delicious side dishes to compliment other dishes. The sour taste goes very well with red meat and heavy dishes.

If you are new to fermented vegetables, we recommend you introduce them to your diet gradually as the probiotic content is very high and your body might need some getting used to it. Start with a tiny bit and work your way up.

Part 1

Sauerkraut

  Html   Print  

Sauerkraut

White cabbage

Cumin seeds

Juniperberries

Salt

1

20

20

Kg

g

g

g

Cutting board

Knife

Bowl

Scales

Fermentation jar

Cheese mat

Weight stones

Plastic gloves


Remove the outer layer of cabbage leaves from the cabbage head.

Halve the cabbage head and remove the stem.

Shred the cabbage finely or slightly coarser - up to 1 cm wide.

Weigh the cabbage on the scales and put it into a big bowl.

Pour boiling water over cumin seeds and juniper berries to sterilize them. 

Only add them to the cabbage now if you would like strongly spiced cabbage – if not, wait until you jar the cabbage.

Determine how much salt you need (2% of the weight of the cabbage) 

Sprinkle salt over the cabbage, mix it in well and make sure to distribute it evenly.
Leave it for 10 minutes. Make use of the time by preparing fermentation jar, cheese mat and weights.

Massage the cabbage with your hands to squeeze out more juice and crush the fibres a little bit. Use only throughly cleaned hands or use plastic gloves.

Fill the cabbage into the fermentation jar along with the juices. Press firmly down on the cabbage to eliminate any airpockets. Only fill the glass 75%.

Place a clean cheese mat on top the cabbage, a fermentation weight (or glass) on top of that to keep the cabbage submerged in brine. Seal the jar with a lid.

Leave the fermentation jar at 18-22°C and let it ferment for up to 4 weeks.

If you are only able to provide lower temperatures, extent fermentation time.

Daily throughout the fermentation, loosen the lid on the jar to let out carbon dioxide out if your fermenation jar does not have an airlock or a water seal. Remember to tighten the lid again. 

If the cabbage is not submerged in brine after 24 hours, make and add a little extra brine (water with 2% salt: 1 litre water + 20 g salt).

Tips to spice up the recipe:

- Add a bit of white wine to the cabbage as long as it does not contain sulphites.

- Mix in shredded either carrots, spring onions, dill or similar with the cabbage.

Kimchi

  Html   Print  

Kimchi

Chinese cabbage (1 head)
Carrots (2 pcs)
Chinese radise (5-8 cm)
Pak Choy (1 pcs)
Kimchi-paste
Salt
Salt (for brine)

750
100
100
100
25
20
150

g
g
g
g
g
g
g

Cutting board
Knife
Bowl
Scales
Water boiler
Blender

Fermentation jar
Cheese mat
Weight stone
Plastic gloves


Make the kimchi-pasta in advance:

Peel garlic cloves and ginger, coarsely chop them.

Weigh all ingredients except water and apple juice and blend them in a blender.

Mix water and apple juice.

Blend the ingredients while adding the apple juice mix to form a smooth paste.

Fill the paste into a glass jar with lid and store it in the fridge – this portion is enough for several batches of kimchi.


Kimchi-paste - suggestion

Garlic cloves
Ginger root
Paprika ground
Chili/Flakes
Fish sause
Apple juice
Water

25
25
50
15
10
40
35

g
g
g
g
g
ml
ml

12 hours prior to making kimchi:

Make a 5% saturated brine (mix 3 litres of water with 150 g of salt).

Remove the outer layers of cabbage leaves from the cabbage head.

Place the cabbage head in the brine and leave it there for 12 hours.

Put a heavy plate on top of the cabbage hed to weigh down and submerge it in brine.


Preparing the cabbage, carrots, china radish and spring onions:

Get the cabbage head from the pot and throw away the brine it was soaked in.

Rinse the cabbage head under cold water.

Cut the stem off.

Rinse carrots and the Chinese radish thoroughly - cut top and bottom off

Rinse the spring onions.

Cut the cabbage head into four quarters and cut each in 4-5 cm smaller pieces

Shred the carrots.

Cut the chinese radish in thin slices using a vegetable slicer or potato peeler. 

Chop spring onions coarsely.

Weigh the vegetables on the scales and place them in a bowl.

Add salt - use 2% of the total weight of the vegetables.

Add kimchi-paste - use 2,5% of the total weight of the vegetables.

Use clean hands or plastic gloves to carefully mix and massage it into the vegetables – it after 5 minutes the cabbage will usually have given of enough juice.

Fill the mix into a fermentation jar along along with the juices and firmly press down to on th evegetables to eliminate airpockets and sumberge it under the brine. Only fill the jer 75% as the vegetables may expand in the process.

Put a clean cheese mat on top, then weights to keep the vegetables covered in brine – put the lid on the fermentation jar.

Leave the jar at 18-22°C for 4 - 7 days. If you are only able to provide cooler temperatures, leave it to ferment longer. If the temperature is higher, cut fermentation time short. 

Let the pressure out of the jar daily if you are not using an airlock or a water seal on the jar.

Taste the kimchi 4–7 days into the fermentation. If acidic seems high enough for you, move the jar to the fridge and after cooling, the kimchi is now ready to be enjoyed.

Note: It is important to end the fermentation while bubbles still rise to the surface.

Tip: You can adjust the strength of your kimchi if it is too hot for you. Partly or completely substitute the chili powder with milder spices like paprika. Or, if you cannot get it strong enough, just add more chili.

Enjoy the kimchi like a side dish with other dishes or mixed into a crisp salad.

Pickles

  Html   Print  

Pickles

Cauliflower
Broccoli
Onions
Carrots
Celery root
Bell peppers
Turnip/ Parsnip

Total weight 750 g

You can also use beet root in pickles but it will colour all the vegetables blue and purple.


Make a brine: Use ½ litre of pure water and add 5% salt (25 g)

Rinse the vegetables thoroughly under water and cut the top and bottom of.

Dice the vegetables into smaller pieces - 1 × 1 cm.

Place the vegetables in the fermentation jar, add brine and submerge the vegetables in it.

Cover the vegetables with a piece of cheese mat and put weights on top to keep the vegetables under the brine. Seal the fermentation jar.

Ferment it at 18-22°C for 4-7 days – then move the jar to the fridge.

Spicy pickles:

Add 500 g fresh pickles to a pot and add:

2 dl apple cider vinegar

150 g sugar

2 tbsp. carry

2 tbsp. turmeric

2 tbsp. Dijon mustard

In a pot, heat all the ingredients and bring it to boil for 1-2 minutes while stirring.

Season it with salt and pepper to taste.

Jar the spiced pickles and let then cool off before you move the jar to the fridge. Enjoy!

Remoulade:

Mix 1 part pickles with 1 part mayonnaise.

Season it with sugar, salt and apple cider vinegar – you could also add finely chopped and pickled gherkins.

Piquant Hummus

  Html   Print  

Piquant hummus

Chickpeas

For cooking chickpeas
- Salt
- Pepper corns
- Bay leaves

Fermentation
- Salt
- Starter culture

Other ingredients:
- Olive oil
- Lemon Juice
- Water

Seasonings to taste - Example:
- Salt
- Ground cumin
- Garlic
- Tahini
- Ground Paprika/Chili/Cayenne

½


1
8
2


5
½


3
½-1
1


1
2
2
1
½

kg


tsp
corns
leaves


g
sachet


dl
dl
dl


tsp
tsp
cloves
tsp
tsp

 Fermentation jar

Fermented chickpeas contribute with a pleasant flavour to any hummus but there are more benefits to fermented chick than just the nice taste. The fermentation process breaks down most of the phytic acids in chick peas that tends to bind certain minerals in our digestive tract, making them unavailable for absorption and therefore not desireable in larger quantities.

Use a starter culture with lactic acid bacteria to ferment the chickpeas.

Use only organic chickpeas if possible and never chickpeas from a tin. These have been processed to an extent where they do NOT ferment well.

It is best to cook chickpeas before you ferment them - you can ferment them raw (but soaked) and cook them afterwards but fermenting raw chickpeas give off a horrible smell in the process - and you might risk it sticks to them even after cooking and flavours the hummus in an undesired way.

Begin by soaking the chickpeas before you cook them. By soaking them before you cook them, you reduce cooking time and the less nutrients and minerals will be lost to the water. It is always better to cook them for a reduced amount of time. Soaking also reduces the content of phytic acid by half.

Soak the chickpeas for 18 hours in cold water. It is a good idea to change the water a couple of times during the soak.

After soaking - add the chickpeas to a pot along with seasonings, like salt, pepper corns and bay leaves to taste. Cook the peas at low heat for 1-3 hours until they seem nice and soft. 

Prepare a fermentation jar - make sure it has been thoroughly cleaned. 

Place the cooked chickpeas in a bowl and crush them using a clean fork to break the outer shell. You may also use a blender.

Add starter culture, fermentaion salt and mix thoroughly.

Fill the chickpeas into the fermentation jar - only fill it 75%.

Ferment the chickpeas at room temperature for 5 - 7 days.

After 5 - 7 days the chickpeas can be used for making hummus.

You can also freeze them in small portions - it is nice to have some at hand to defrost and whip up a quick batch of hummus.

Your piquant hummus is now fast and easy to make:

Mix fermented chickpeas in a blender with all the ingredients and blend until smooth.
That is it - the hummus is ready to be enjoyed. 

Yum-mus!

Part 2

Broccoli

  Html   Print  

Broccoli with herbs

Broccoli
Lemon
Fresh estragon
Garlic

Salt
Water (for brine) 

500
1
10
20

25
½

g
pcs
g
g

g
litre

Cutting board
Knife
Bowl
Scales


Fermentation jar
Cheese mat
Weight stone


Rinse the broccoli, the lemon peel, the fresh estragon and peel garlic cloves.

Cut the broccoli into smaller pieces.

Keep the stem, peel it and make 1 cm dices.

Fill broccoli into the fermentation jar.

Cut a few pieces of lemon and add them to the jar.

Squeeze the juice from the rest of the lemon into the jar.

Take the leaves off the estragon stems and add them to the jar.

Add whole garlic cloves the jar - or chop them coarsely.

Put a clean cheese mat on top, then weights to weigh the vegetables under the brine – then seal the fermentation jar.

Ferment it at 18-22°C for 4-7 days.
Move the jar to the fridge.
- Enjoy it as it as a side dish with other dishes –
- or mixed in with a crisp salad -

Beetroot kvass

  Html   Print  

Beet root kvass

Beet root
Orange
Ginger root

Salt
Water (for brine)

500
1
30

10
2

g
pcs
g

g
litre

Cut top and bottom of the beets. Rinse them very well but leave the peel on. Cut 1-2 cm dices.

Rinse the ginger root and shred it.

Rinse the orange peel carefully and cut a few slices.

Add these ingredients to the fermentation jar:

- Diced beets.

- Shredded ginger.

- Orange slices.

- Orange Juice, squeeze the rest of the orange.

Dissolve salt in a small amount of boiled water. Mix that with cold water for the brine.

Pour the brine over the vegetables in the fermentation jar to submerge them fully.

Put a clean cheese mat on top and weights on top to weigh the vegetables under the brine. Seal the jar with a lid.

Let the pressure out of the jar daily if you are not using an airlock or a water seal. Let it ferment at 18-22°C for 4-7 days.

Run the content of the jar through a strainer to collect the juice and bottle it.

Seal the bottles and leave it to ferment for another few days at 18-22°C before you move the bottles to the refrigerator. Enjoy!

Tip: You will know when to end the last fermentation if you make one of the bottles a plastic bottle (make sure it is food safe). When it swells up and become deformed, it is an idication that pressure is building up and it is time to end the fermentation. Move the bottles to the refrigerator to chill them.

Chutney

  Html   Print  

Chutney

Cranberries
Apple
Raisins
Onion
Celery root

Water
Apple cider vinegar

Ground cinnamon
Ground ginger
Ground garlic

Whey and/or water kefir

2
1
1
1
1

½
¼

½
½
¼

1

dl
pcs
dl
pcs
dl

dl
dl

tsp
tsp
tsp

tbsp


Rinse the apple, the celery root and the onion.

Shred the apple and the celery.

Finely chop the onion.

Mix all the ingredients together in a pot – except for water kefir / whey.

Boil it for about 30 minutes.

Let it cool to 20°C before you add whey / water kefir - mix it in thoroughly.

Add everything to a fermentation jar and seal the jar.

Ferment it for 3-5 days at 18-22°C before you move it to the refrigerator. It stays stable for about 2 months in the refrigerator.

This recipe can be altered in endless ways. You can make pickles from many other vegetables and spices and combine them in different ways. Try using some mango fruit – not fully ripened.  

Salted cucumber

  Html   Print  

Salty Gherkins

Small cucumbers
Garlic
Fresh dill or dill seed-heads
Fresh estragon
Frisk horse radish

Brine of:
- Water
- Salt
- Bay leaves
- Juniper berries
- Black pepper corns

1
6
2


2
3


1
72
8
8
8

kg
cloves
stems


stems
cm


litre
g
leaves
pcs
pcs


Bring water to boil with salt and seasonings. Cool off to 20°C (use a water bath).

Peel garlic cloves.

Peel the horse radish and thinly slice it. Use a potato peeler or vegetable slicer.

Rinse the cucumbers and poke holes in them. You can peel and cut them in halves to remove the seeds.

Layer small cucumbers in the fermentation jar with garlic, dill, estragon and horse radish.

Do not fill the jar up completely, leave some space up to the top.

Pour the brine over the cucumbers to submerge them fully. 

Place a cabbage leave or a piece of cheese mat on top of the cumcumbers and then fermentation weights or a glass to keep them under the brine.  

Put the lid on the jar and seal it loosely. 

Place the jar at 18-22°C for a few days until the fermentation process is going well. Then close the lid tight and leave the cucumbers to ferment for another couple of days. 

Let the pressure out of the jar daily if you are not using an airlock or a water seal.

After a few days, move the jar to the refrigerator where the fermentation process will continue at a much slower rate. As it ferments you will notice the colour of the gherkins change from light green to dark green as acids interact with chlorophyll in peel. On the inside, the meat changes colour from white to a transparent as oxygen is forced out of the cells. The cucumbers also expand due to the absorption of salt and are more likely to sink towards the bottom now, rather than rising to the surface. 

The ferment is ready after one month fermentation. 

Use them to compliment and spice up other dishes - but always, only use clean forks to pick them out of the jar. 

You can ferment bell peppers, green tomatoes, cauliflower, garlic, carrots and onions in the same way.

Be brave and experiment!

Sources of inspiration

Recipes

In this section we give you all of our favorite recipes and the last section provides links to other websites for more recipes. Be bold and play with it - fermentation is fun. Try to ferment what is in season, combining vegetables, herbs and fruits to create unique seasonal food experiences and know that, most vegetables taste quite different and so much better when they are fermented.

Enjoy fermented vegetables as delicious side dishes to compliment other dishes. The sour taste goes very well with red meat and heavy dishes.

If you are new to fermented vegetables, we recommend you introduce them to your diet gradually as the probiotic content is very high and your body might need some getting used to it. Start with a tiny bit and work your way up.

Salted cucumber

Recipes

In this section we give you all of our favorite recipes and the last section provides links to other websites for more recipes. Be bold and play with it - fermentation is fun. Try to ferment what is in season, combining vegetables, herbs and fruits to create unique seasonal food experiences and know that, most vegetables taste quite different and so much better when they are fermented.

Enjoy fermented vegetables as delicious side dishes to compliment other dishes. The sour taste goes very well with red meat and heavy dishes.

If you are new to fermented vegetables, we recommend you introduce them to your diet gradually as the probiotic content is very high and your body might need some getting used to it. Start with a tiny bit and work your way up.


Copyright (c) Hjemmeriet - 2009..2024 - Nyvangsvej 93, 4100 Ringsted - Bemærk: Cirka 20 km fra Ringsted centrum
Telefon: 23 24 48 00 - E-Mail: Hjemmeriet@Hjemmeriet.com - CVR.nr. 41408391 - Hjemmeriet v/Eva Maria Jochimsen
Updated: 2024-11-08 21:41:59
1/0 - Visitors: 1495890 - 1